Why You’ll Love these Traditional Venezuelan Arepas
If you’ve never tried Venezuelan arepas before, you’re in for a real treat.
These golden-crisp corn cakes are the perfect balance of simplicity and versatility. Imagine biting through that toasty exterior to find a warm, tender center that’s just waiting for your favorite fillings.
What makes arepas so special? For starters, they’re naturally gluten-free.
Plus, they’re incredibly adaptable—stuff them with cheese, meat, avocado, or whatever your heart desires.
The best part? You can make them with just three humble ingredients: cornflour, water, and salt.
Simple food, extraordinary results.
What Ingredients are in Traditional Venezuelan Arepas?
The beauty of Venezuelan arepas lies in their simplicity—just a few basic ingredients transform into something truly special.
These pocket-like corn cakes form the foundation of Venezuelan cuisine, where the focus is on quality rather than complexity. What’s remarkable about traditional arepas is how such humble ingredients create something so versatile and satisfying, a canvas for countless fillings and flavor combinations.
- 3 cups pre-cooked white cornmeal (specifically Harina PAN brand)
- 4 cups water (lukewarm or cold)
- 1 teaspoon salt
- Vegetable oil (for cooking)
When shopping for ingredients, the cornmeal is where you’ll want to pay special attention. Look specifically for pre-cooked white cornmeal (Harina PAN is the authentic choice), not regular cornmeal or masa harina used for Mexican dishes. This special cornmeal gives arepas their characteristic texture and flavor.
The water temperature matters too—lukewarm works best for easier handling of the dough. And while the recipe is incredibly simple, don’t be tempted to skip the resting time, as those five minutes allow the cornmeal to fully absorb the water, creating that perfect arepa texture we’re after.
How to Make these Traditional Venezuelan Arepas
Making Venezuelan arepas is surprisingly simple, yet the technique makes all the difference. Start by combining 4 cups of water (lukewarm or cold works best) in a large bowl with 1 teaspoon of salt, mixing well to dissolve.
Now comes the critical step—gradually add the 3 cups of cornflour (Harina PAN), sprinkling it in bit by bit while mixing with your fingers in a circular motion. This careful addition prevents those pesky lumps that can ruin the texture. The dough should feel smooth and pliable, not too wet or too dry. You know you’ve got it right when it doesn’t stick to your hands but still feels moist.
After mixing, let your dough rest for exactly 5 minutes—trust me, this little pause makes a world of difference as it allows the cornmeal to fully absorb the water.
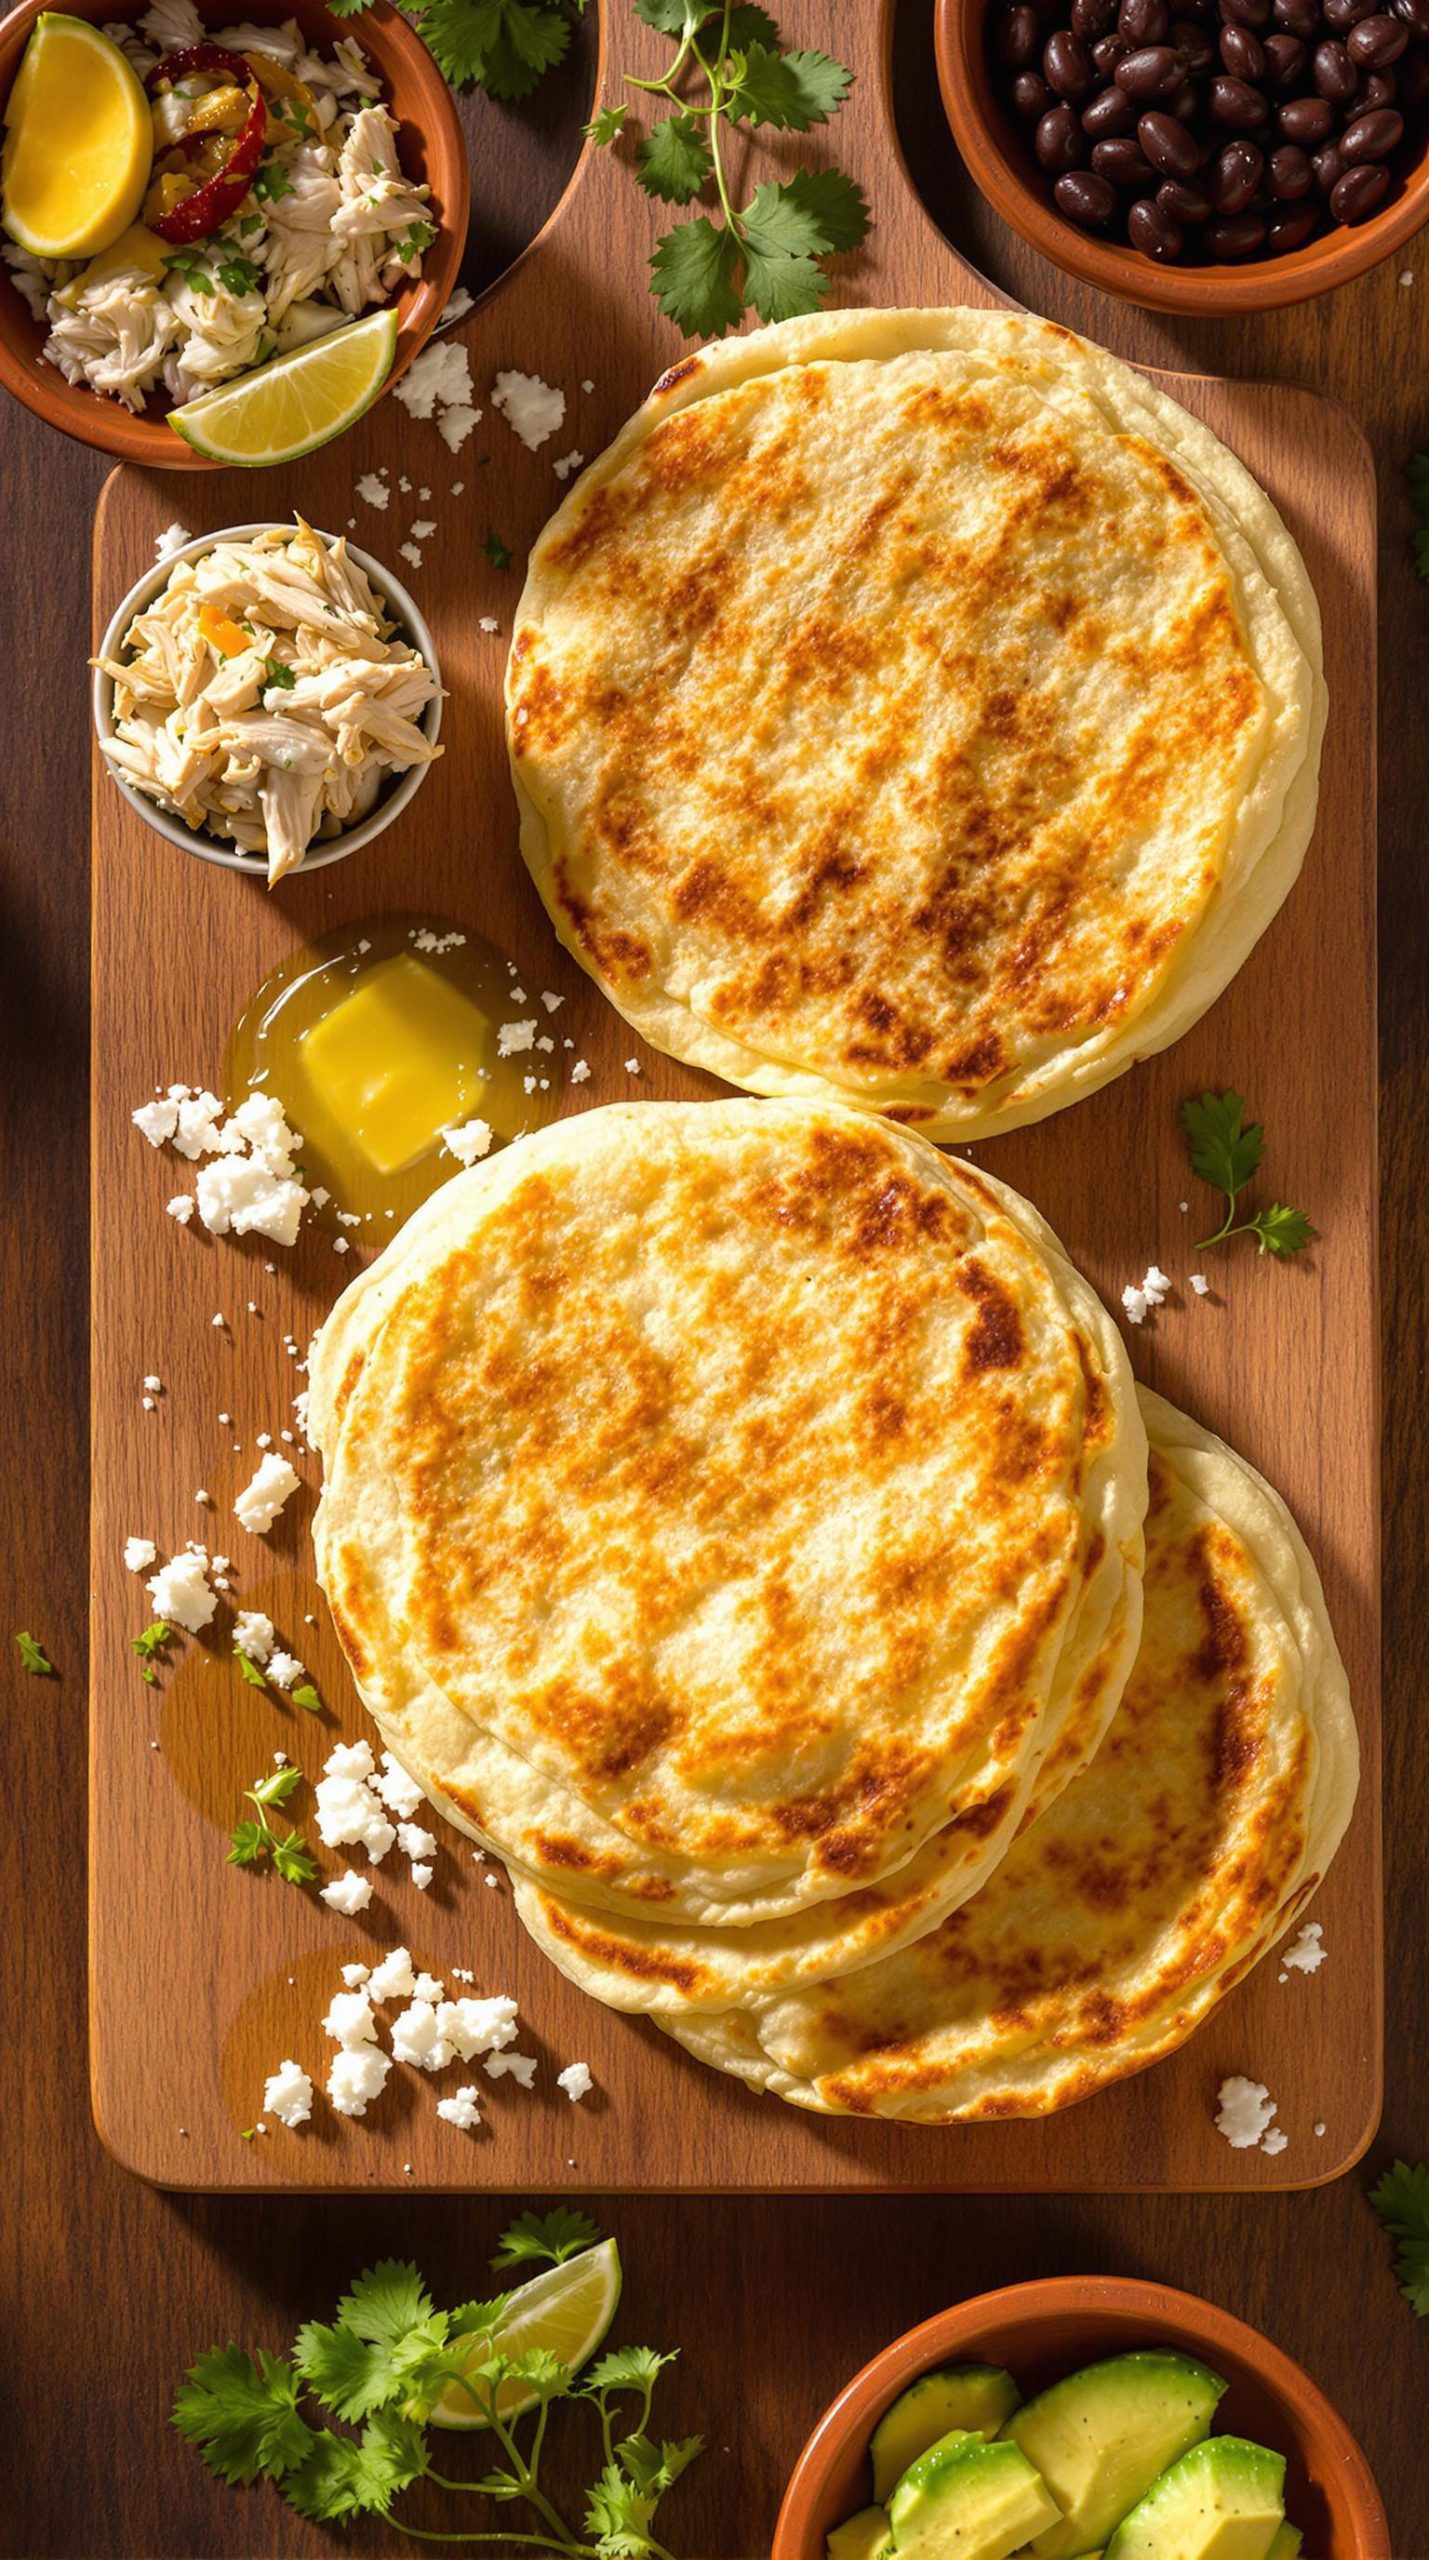
Form snow ball-sized portions of the dough and flatten them between your palms until they’re about 2 inches thick. Heat up an iron skillet with a touch of vegetable oil, and place your arepas on the hot surface. They’ll need about 5-7 minutes per side, until you see that beautiful golden-brown crust forming.
When both sides are nicely toasted, transfer them to a preheated 350-degree oven for the final 20-30 minutes of cooking. This two-step cooking process—stovetop searing followed by oven baking—ensures your arepas develop that characteristic crispy exterior while remaining tender inside.
For the ultimate cooking experience, consider using high-end seafood cookware which provides exceptional heat distribution for perfectly crisp arepas every time. Many culinary enthusiasts are now investing in premium appliances specifically designed to handle diverse cooking techniques across cuisines.
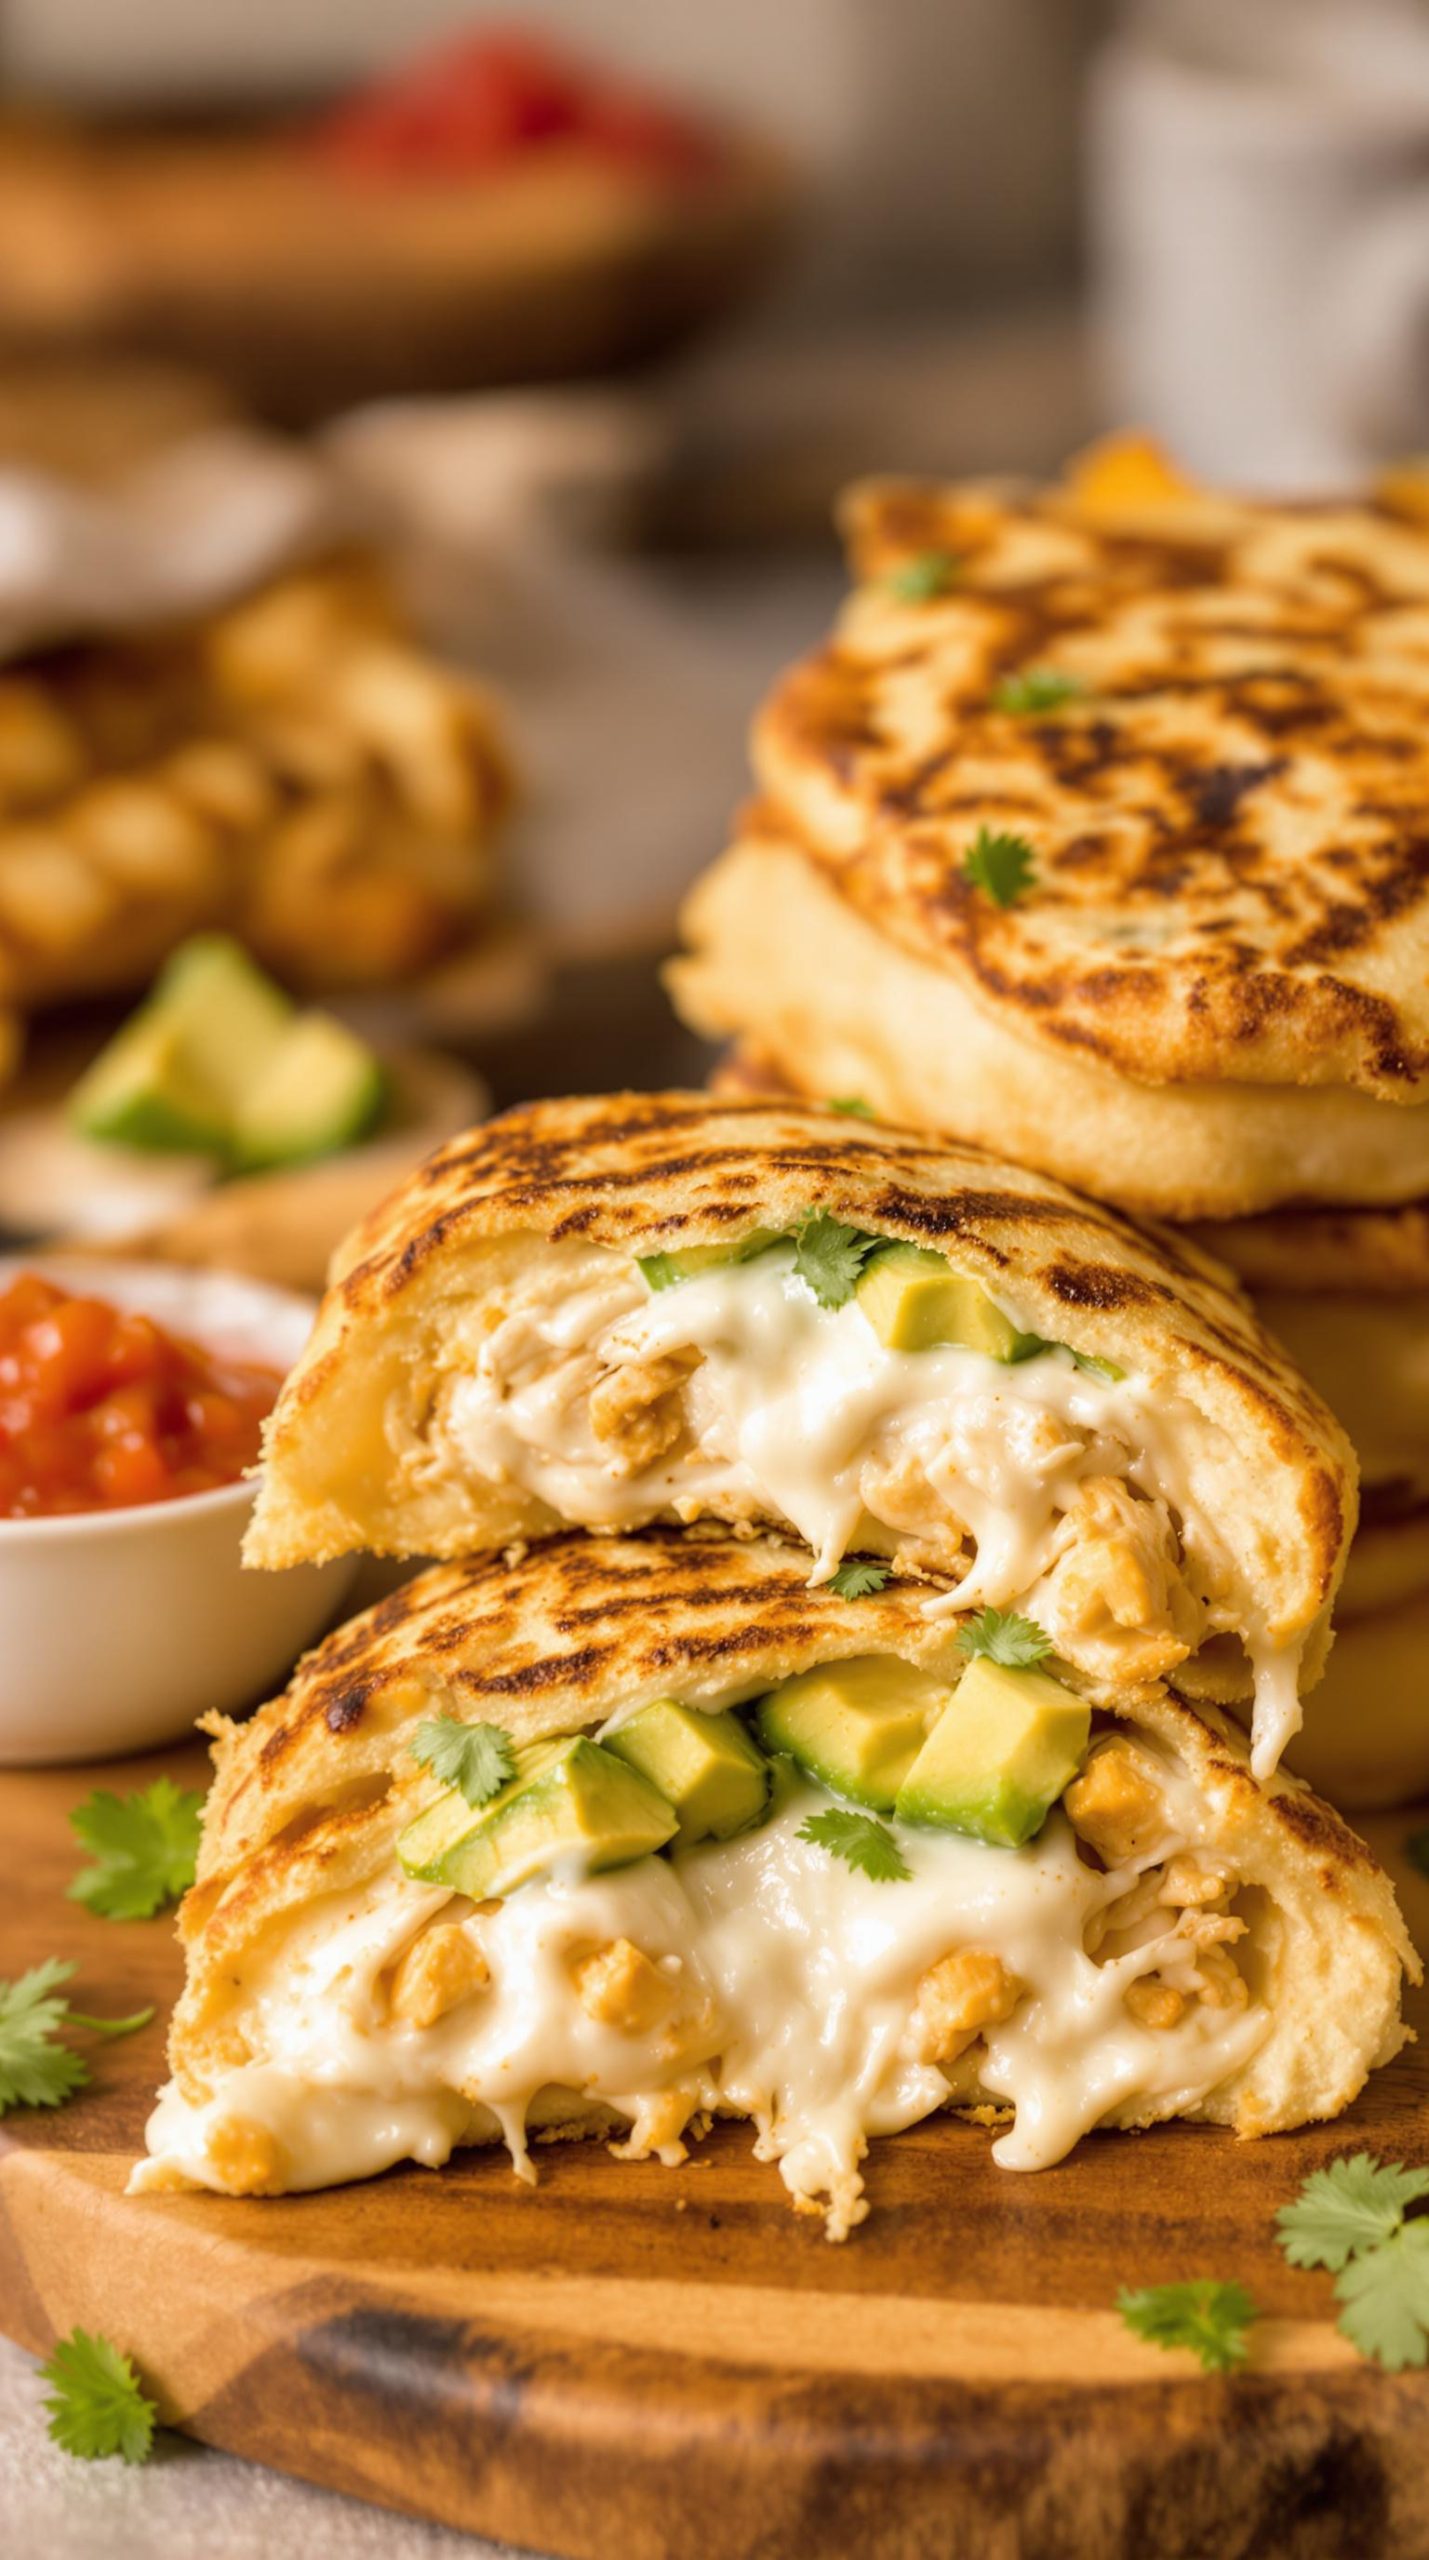
The real magic happens when they’re done cooking. These warm pockets are traditionally split open (like cutting a pita bread) and stuffed with, well, practically anything you fancy.
Butter melting into the hot interior is a simple yet heavenly option. Cheese is a classic filling—from mild white cheeses to more robust varieties. Ham, shredded chicken, avocado, beans… the possibilities are truly endless. In Venezuela, families often set up an arepa bar with various fillings so everyone can customize their own.
And isn’t that the beauty of this humble dish? So simple to make, yet so accommodating to whatever ingredients you have on hand.
Traditional Venezuelan Arepas Substitutions and Variations
While traditional Venezuelan arepas call for specific ingredients like Harina PAN (precooked cornmeal), you’ve got plenty of room to experiment with substitutions and variations that still honor the essence of this beloved dish.
Can’t find Harina PAN? Regular masa harina works in a pinch, though the texture might be slightly different.
For a nutritional boost, I like combining the cornmeal with quinoa or adding shredded vegetables to the dough.
As for fillings, why limit yourself? Beyond traditional cheese and ham, try scrambled eggs for breakfast arepas, or go gourmet with avocado and grilled chicken.
The possibilities are endless, really.
What to Serve with Traditional Venezuelan Arepas
When planning your Venezuelan arepa feast, you’ll need some perfect accompaniments to complete the meal.
I love serving mine with a side of Venezuelan black beans (caraotas negras) or a fresh avocado salad with cilantro and lime.
For drinks, nothing beats a cold batido (fruit smoothie) or a tangy fruit juice like guava or passion fruit.
The beauty of arepas is their versatility.
Add some sliced plantains—either sweet maduros or savory tostones—for an authentic touch.
Can’t forget the sauces, right? A little guasacaca (avocado sauce) or ají picante adds that perfect kick of flavor.
Final Thoughts
These Venezuelan arepas have completely changed my home cooking game.
There’s something magical about transforming simple cornmeal into these versatile, golden discs that can hold practically any filling your heart desires.
I’m convinced the 5-minute rest period is what gives them that perfect texture—crispy outside, tender inside.
And while the technique might seem tricky at first (that circular finger motion is key), I promise you’ll get the hang of it.
What I love most? They’re naturally gluten-free and can be prepped ahead for busy weeknights.
Why not try making a batch this weekend?